
Choosing vinyl flooring for a home renovation is often seen as a straightforward decision focused on aesthetics and durability. However, the true success of this integration goes far beyond the surface. A flawless, long-lasting vinyl floor is not merely a product choice but the result of a strategic process—a synergy between expert installation, meticulous subfloor preparation, and material selection perfectly aligned with the unique demands of each renovated space. This approach ensures your investment is both beautiful and built to last.
Navigating this process requires a clear understanding of how flooring fits within a larger project, a task best handled by a comprehensive team. Engaging with an experienced firm like trehanerenovation.com ensures that every stage, from subfloor assessment to the final plank placement, is managed with professional oversight, preventing costly errors and guaranteeing a seamless finish.
Your Vinyl Renovation Blueprint
- Contractor is Key: Success begins with selecting a specialist who understands vinyl’s unique demands within a renovation context.
- Subfloor is Everything: Proper preparation, especially moisture control in areas like basements and bathrooms, is non-negotiable.
- Material in Context: The right type of vinyl (LVT, LVP, Sheet) must match the functional needs of the room.
- Long-Term Vision: Correct installation and care are essential for maximizing the durability and value of your investment.
Navigating Contractor Selection for Your Vinyl Flooring Renovation
The success of your vinyl flooring installation is deeply tied to the expertise of the professional you hire. For an integrated renovation, you need more than a general contractor; you need a specialist who understands the nuances of vinyl. Look for a proven track record in projects that involve kitchens, bathrooms, and basements, as these areas present unique challenges like moisture and uneven substrates that require specific solutions.
A qualified contractor’s value is evident from the start. As one industry voice explains, choosing a professional ensures every critical step is handled correctly, from initial subfloor inspection and old flooring removal to precise measurements and expert installation. This diligence is what leads to a durable and aesthetically pleasing result. When vetting potential hires, a structured approach is crucial for making an informed decision.
Checklist for Selecting Vinyl Flooring Contractors
- Verify contractor credentials and insurance.
- Inspect previous project portfolio with vinyl flooring.
- Confirm knowledge of moisture management in kitchens and basements.
- Review detailed cost and timeline proposals.
Understanding how vinyl flooring costs are presented within the broader renovation budget is equally important. A detailed proposal should break down material costs, labor, subfloor preparation, and any necessary accessories like underlayment or transition strips. This transparency helps you avoid hidden fees and ensures the project aligns with your financial planning. While a DIY approach might seem cost-effective, the risks often outweigh the savings.
Here is a direct comparison between attempting the installation yourself and hiring a seasoned professional.
| Aspect | DIY Installation | Professional Installation |
|---|---|---|
| Skill Required | High, risk of errors | Expertise ensures quality |
| Time | Longer duration | Usually 1-2 days |
| Cost | Lower materials cost but possible rework | Higher initial cost, warranty included |
| Outcome | Varies greatly | Consistent and durable |
Ultimately, due diligence in verifying credentials, checking references, and reviewing past projects is the best way to secure a positive outcome. This foundational step provides the peace of mind that your investment is in capable hands.
The quality of vinyl flooring installation is entirely dependent on the subfloor condition and the contractor’s expertise.
– E&M Services, Choosing a professional flooring contractor for LVT fitting
Strategic Subfloor Preparation for Vinyl in High-Moisture Renovation Zones
While vinyl is celebrated for its water resistance, its performance is entirely conditional on the quality of the subfloor beneath it. This is the most critical and often overlooked stage of installation, especially in high-moisture zones like basements, kitchens, and bathrooms. An improperly prepared subfloor can lead to peeling, buckling, and mold growth, completely negating the benefits of the vinyl itself. In fact, a staggering over 75% of vinyl flooring failures in moisture-prone areas result from inadequate subfloor moisture barriers.
What is the most critical step in subfloor prep for vinyl?
The most critical step is moisture mitigation. This involves testing the subfloor’s moisture content and installing an appropriate moisture barrier to prevent water vapor from damaging the flooring from below.
In basements, the primary challenge is managing humidity and potential moisture from the concrete slab. Before any vinyl is laid, the concrete must be tested for moisture vapor emission. A high-quality moisture barrier is not just recommended; it is essential for protecting the integrity of the flooring system and preventing future issues.
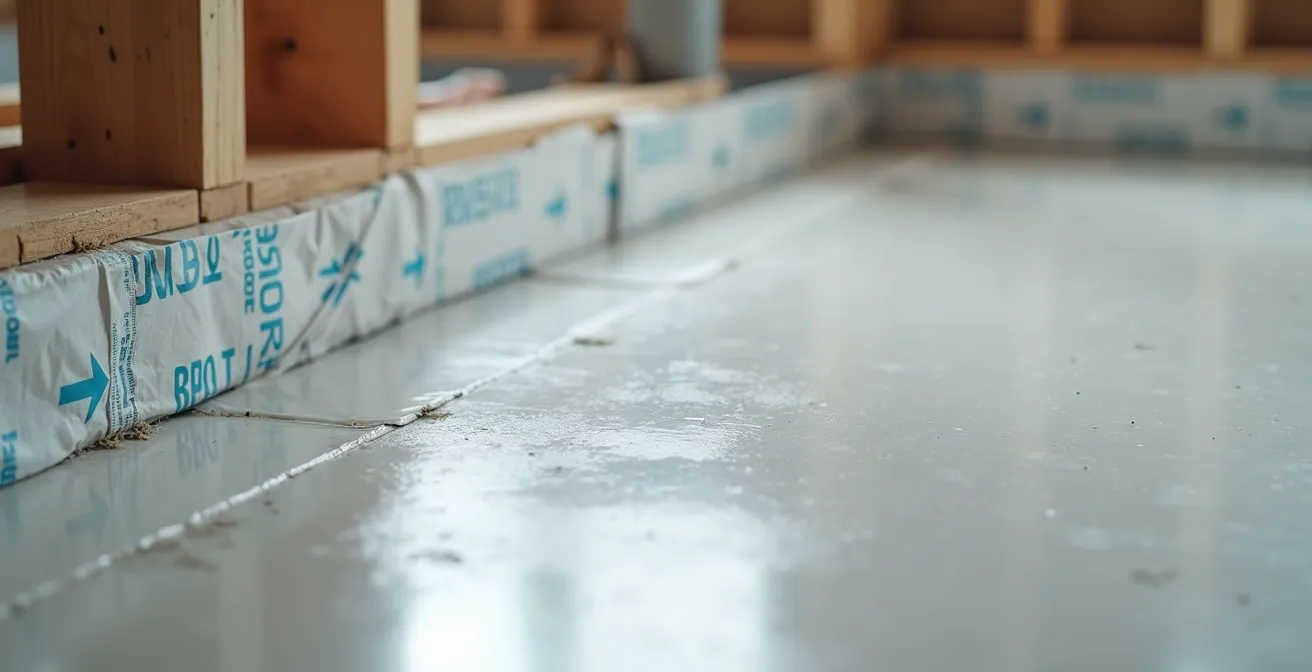
As seen in professional installations, a proper moisture barrier involves more than just rolling out a plastic sheet. It requires sealing all seams with waterproof tape and ensuring a complete seal around pipes and along walls. This meticulous attention to detail is what creates a truly impervious layer, safeguarding your renovation investment for years to come. In kitchens and bathrooms, preparation involves ensuring the subfloor is perfectly level and sealed around plumbing and appliance cutouts to prevent water from seeping underneath.
As flooring experts from Floor Boys note, a combination of thorough moisture testing, proper barrier installation, and professional-grade seam sealing is what dramatically improves the longevity of vinyl floors in basements. Adhering to a strict preparation protocol is the key.
Subfloor Preparation Steps for High-Moisture Areas
- Check subfloor moisture content; ideal levels are below 2.5% CM for cement screed.
- Level any gaps or uneven surfaces before installation.
- Remove debris, grease, chemical residues, and nails thoroughly.
- Clean and dry subfloor completely before laying vinyl.
Material Synergy: Aligning Vinyl Choices with Renovation Design and Function
Once the subfloor is properly prepared, the focus shifts to selecting the right type of vinyl. This decision should balance aesthetics with the functional demands of the renovated space. The three main categories—Luxury Vinyl Tile (LVT), Luxury Vinyl Plank (LVP), and Sheet Vinyl—each offer distinct advantages. For instance, LVT is ideal for creating sophisticated tile looks in high-traffic areas, while sheet vinyl provides a seamless, highly water-resistant surface perfect for bathrooms or laundry rooms.
Understanding these differences is crucial for long-term satisfaction. Here is a breakdown of how common vinyl types compare across key renovation criteria.
| Vinyl Type | Best Use | Water Resistance | Durability | Cost |
|---|---|---|---|---|
| LVT (Luxury Vinyl Tile) | High traffic, aesthetic focus | High | High | Higher |
| LVP (Luxury Vinyl Plank) | Wide plank look, moisture areas | High | High | Moderate |
| Sheet Vinyl | Wet areas budget-friendly | Very High | Moderate | Lower |
Design synergy is just as important. The vinyl’s pattern, color, and texture should complement other finishes in the room, such as cabinetry, countertops, and tile. This cohesive approach elevates the entire renovation. As experts from Wood Origins suggest, selecting the right vinyl type based on area demands is crucial for renovation success. Beyond looks, technical specifications like the thickness of the wear layer are critical. A thicker wear layer provides greater resistance to scratches and scuffs, making it a wise choice for busy households. The growing popularity of vinyl is a testament to its versatility, with the vinyl flooring market expected to grow by 7.5% CAGR through 2032.
To fully appreciate its benefits, it’s helpful to understand the key advantages of vinyl flooring, which include its resilience, low maintenance, and vast design options. When budgeting, be sure to account for the full picture.
Tips for Matching Vinyl Flooring with Renovation Elements
- Coordinate vinyl patterns with cabinetry and countertops.
- Choose wear layers suited to traffic intensity.
- Include costs for underlayment, adhesives, and transitions.
- Consider professional installation to ensure durability.
Key Takeaways
- Successful vinyl integration depends more on contractor skill and subfloor prep than the product itself.
- In moisture-prone areas like basements, a professionally installed moisture barrier is absolutely essential for longevity.
- Choose the right type of vinyl (LVT, LVP, Sheet) based on the specific traffic and water exposure of each room.
- A detailed budget should always include costs for subfloor prep, underlayment, and professional labor.
Execution and Long-Term Performance in Renovated Spaces
The final phase of integrating vinyl flooring into your renovation involves meticulous execution and a commitment to long-term care. During installation within an active renovation, coordination with other trades—such as plumbers, electricians, and painters—is essential to prevent damage to the newly laid floor. A professional installer will manage this timeline effectively, ensuring the flooring is one of the last elements to be put in place.
The technical details of the installation itself are paramount for ensuring a flawless finish that lasts for decades. This includes allowing the material to acclimate to the room’s temperature and humidity for at least 48 hours before installation, which prevents expansion or contraction issues later on.
Proper installation practices including expansion gaps and transitions are critical for a flawless and long-lasting vinyl flooring finish.
– Town & Country Carpet and Floor Covering, The Truth About Vinyl Plank Flooring
Once installed, the long-term performance of your vinyl floor depends on proper maintenance. As highlighted in testimonials, regular care with pH-neutral cleaners, controlling indoor humidity, and using protective pads under heavy furniture are simple yet effective practices. These habits preserve the floor’s appearance and enhance its longevity. To maximize the durability of your new floor, follow a clear post-installation care plan.
Post-Installation Best Practices
- Allow 48-hour acclimation period before installation.
- Maintain temperature between 65-85°F to prevent plank movement.
- Inspect and clean seams regularly to prevent moisture ingress.
- Use manufacturer-recommended cleaning products.
A well-executed vinyl flooring project does more than just update your home’s aesthetic; it adds tangible value. Studies show that homes with updated vinyl flooring report up to 5% increase in property value. This return on investment, combined with the material’s durability, makes it a smart choice for any modern renovation. When you’re ready to make your selection, be sure to Explore the best LVT flooring options to find the perfect match for your project.
Frequently Asked Questions about Renovation Flooring
Can I install vinyl flooring directly over my existing tile?
In some cases, yes, provided the existing tile is in excellent condition, well-adhered, and perfectly level with minimal grout lines. However, a professional will often recommend removing the old tile or applying a self-leveling compound to create a smooth, stable subfloor for the best long-term results.
What is the difference between LVT and LVP?
The primary difference is their shape. Luxury Vinyl Tile (LVT) comes in square or rectangular tiles that typically mimic the look of stone or ceramic. Luxury Vinyl Plank (LVP) comes in long, narrow planks designed to replicate the appearance of hardwood floors.
How long does vinyl flooring need to acclimate before installation?
Most manufacturers recommend allowing the vinyl flooring to acclimate in the room where it will be installed for at least 48 hours. This allows the material to adjust to the home’s specific temperature and humidity levels, preventing issues like buckling or gapping after installation.
Is a thicker wear layer on vinyl flooring always better?
Generally, a thicker wear layer offers better protection against scratches and scuffs, making it ideal for high-traffic areas or homes with pets and children. For low-traffic areas like a guest bedroom, a standard wear layer is often sufficient. The best choice depends on the specific needs of the room.